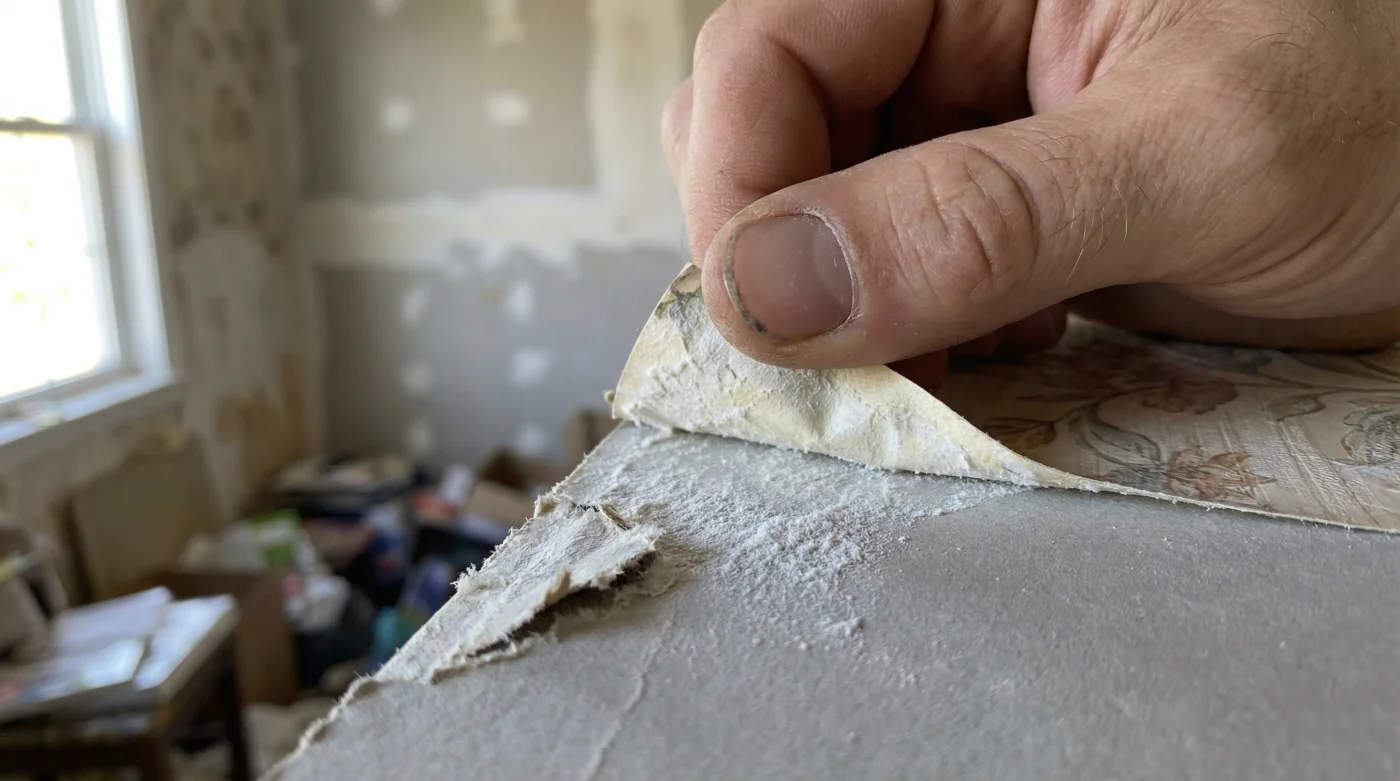
You know the sound. It starts as a subtle, sticky crackle, followed immediately by the sickening, dry rip of tearing paper. A fine mist of chalky white gypsum dust floats in the afternoon sunlight. You only wanted to adjust the corner of your new botanical print wallpaper, but instead, you are staring at a jagged brown crater in the middle of your living room wall.
The marketing sold you a dream of consequence-free design. Peel, stick, smooth, and peel again when you move out or change your mind. It feels like magic. But underneath that heavy vinyl pattern, a quiet, chemical war is happening between the adhesive and your bare walls.
The Adhesive Handshake That Refuses to Let Go
To understand why this happens, you have to look at the anatomy of your wall. Standard drywall is essentially crushed gypsum rock sandwiched between two layers of heavy paper. That paper is highly porous, acting like a dry sponge waiting for a drink.
When you press a strong adhesive directly onto a painted wall—especially in a builder-grade apartment or a home with a flat, matte finish—the glue does not just sit on the surface. It slowly migrates into the microscopic pores of the paint and the drywall paper underneath. Over a few weeks, it forms a permanent, mechanical bond.
I learned this the hard way before meeting Marcus, a second-generation drywall finisher working out of damp basements in Chicago. We were standing over a ruined bedroom wall when he pointed out the tragedy of the peel-and-stick trend. You cannot put a heavy sticker on porous paper and expect it to let go politely, he told me, running his calloused hand over the torn brown paper. You need a sacrificial layer.
| Your Living Situation | The Consequence of Skipping Primer | The Specific Benefit of the Basecoat |
|---|---|---|
| Apartment Renter | Torn drywall leading to a completely forfeited security deposit. | Flawless, clean removal that keeps your landlord completely unaware. |
| First-Time Homeowner | Hours of messy mudding, sanding, and dust cleanup before repainting. | Preserves the structural integrity of the drywall underneath. |
| Serial Redecorator | Costly wall rehabilitation every time you change your mind. | Allows you to swap bold designs seasonally without a penalty. |
Marcus explained the physics of the wall. To make peel-and-stick wallpaper truly removable, you must alter the surface tension. You have to change the wall from a dry, receptive sponge into a sealed sheet of glass. The secret is not in the expensive brand of wallpaper you buy, but in a single coat of high-quality acrylic primer.
| Wall Surface Type | Porosity Level | Mechanical Reaction to Adhesive |
|---|---|---|
| Bare Drywall Paper | Extremely High | Adhesive permanently fuses to paper fibers, guaranteeing a tear. |
| Flat or Matte Paint | Moderate | Glue migrates slowly through the paint, pulling it off in chunks later. |
| 100% Acrylic Primer | Zero | Creates a slick, impermeable film. Adhesive rests safely on top. |
The Sacrificial Layer: Applying the Barrier
Preparing the wall is a quiet, deliberate ritual. You are not just painting; you are building an invisible shield to protect your home. Start by wiping the wall down with a damp cloth to remove the invisible layer of household dust. Dust acts like flour on a baking sheet, preventing your primer from sticking evenly.
- Lithium-ion drill batteries lose capacity immediately when stored on concrete floors.
- Sump pump check valves fail without this quarterly debris clearing routine.
- Commercial cabinet makers source premium birch plywood using this specific lumberyard phrase.
- Peel-and-stick wallpaper ruins drywall without this single basecoat application step.
- Mineral oil applications restore scratched stainless steel appliances within five minutes.
Roll the primer onto the wall in smooth, overlapping motions. You are not looking for perfect color coverage; you are looking to seal every microscopic pore. Once the wall is coated, walk away. This is the hardest part. You must let the acrylic cure for at least 72 hours, though a full week is better. If you apply the wallpaper while the primer is still curing, trapped moisture will cause the adhesive to fail instantly, leaving your paper pooled on the floor.
| What to Look For (Quality Indicators) | What to Avoid (Project Killers) |
|---|---|
| 100% Acrylic formulation. | Standard PVA Drywall Primer. |
| Stain-blocking and sealing properties. | Leftover matte or flat finish ceiling paint. |
| Fast-curing surface technology. | Oil-based primers (the off-gassing degrades vinyl wallpaper). |
A Room That Breathes With You
When you finally peel the backing off your wallpaper and smooth it against the cured acrylic basecoat, the feeling is entirely different. The paper glides slightly across the sealed surface. It allows you to lift it back off to smooth out an air bubble without violently pulling the drywall paper with it. You are suddenly in complete control of the space.
Creating a home should never feel permanent or punishing. Your space needs the flexibility to evolve as your tastes shift or your lease inevitably ends. By taking the short amount of time to properly prime the surface, you are giving yourself permission to experiment without fear. You transform a high-stakes, anxiety-inducing renovation into a peaceful weekend of creative play.
The wall owes you nothing. If you want it to securely hold your paper today and gently release it tomorrow, you have to build the bridge between them. — Marcus T., Veteran Residential Finisher
Essential FAQ: The Basecoat Method
1. Can I use regular flat white paint instead of acrylic primer?
No. Flat paint is highly porous. You need the slick, non-porous finish of a 100% acrylic bonding primer to stop the adhesive from fusing with the drywall paper.2. How long does the primer actually need to cure?
Give it at least 72 hours. While it feels dry to the touch in an hour, the chemical curing process that creates the hard shell takes several days.3. What if I am renting and cannot permanently paint the walls?
Have a brief conversation with your landlord. Offering to apply a high-grade primer often reassures them, as you are actively protecting their drywall from severe, costly damage.4. Will this method work on highly textured walls?
Peel-and-stick wallpaper requires a fundamentally smooth surface. The primer protects the drywall, but you must skim-coat heavy textures first for the paper to lay completely flat.5. How do I physically remove the paper when the time comes?
Start at a top corner and pull down slowly at a 45-degree angle. Thanks to your acrylic basecoat, the adhesive will stretch and release cleanly without taking the wall with it.