The sound of a running toilet at 2 AM is unmistakable. The faint, rhythmic hiss of water escaping down the drain might be a subtle noise, but it echoes through a quiet house like a ticking clock, keeping you awake and whispering about rising water bills.
Most homeowners assume this phantom flushing means a catastrophic failure inside the porcelain tank. You picture a costly plumber arriving the next morning, wrench in hand, ready to dismantle the entire flush valve assembly. The impulse is to rush out, buy a replacement kit, and spend a frustrating Saturday wrestling with corroded brass bolts.
But the reality of domestic plumbing is often much quieter and less dramatic than we fear. That persistent trickling rarely points to a broken system; instead, it points to a tired component. The rubber seal sitting at the bottom of the tank has simply lost its memory, hardened by months of submerged duty.
The Anatomy of a Tired Seal
Think of the flapper inside your toilet tank like the weather stripping around your front door. When it is new, it is supple, conforming perfectly to the porcelain rim to hold back gallons of water. Over time, hard water minerals and chlorine bite into that soft material, drawing out its natural oils and leaving it stiff.
The conventional advice tells you to rip out the whole assembly. Plumbers call it a teardown, a messy process that often creates more leaks than it solves if you aren’t perfectly aligned. We treat a slightly stiff piece of rubber like a total structural collapse. But what if you just needed to restore the moisture that time and water chemistry washed away?
Arthur Vance, a 62-year-old maintenance supervisor who managed a high-rise apartment complex in Chicago, spent decades chasing down phantom flushes. With over four hundred bathrooms to maintain, replacing flush valves wasn’t just expensive; it was a logistical nightmare. Arthur figured out that replacing the rubber wasn’t necessary if you could just rehydrate it. He carried a small blue jar in his tool belt, dabbing a tiny amount of standard household petroleum jelly onto the rim of the aging rubber. This simple trick forced the material to swell slightly and conform perfectly back to the flush valve seat, saving his building thousands of dollars in parts and labor.
Adapting the Fix to Your Fixture
Not all tanks behave exactly the same way, and the water chemistry in your neighborhood dictates how quickly that rubber ages. Understanding the specific environment inside your tank dictates how you handle the repair.
If you live in an area with heavily chlorinated city water, the rubber often turns chalky. In these setups, the material gets brittle around the edges first. You will notice a white residue clinging to the underside of the flapper. You might feel a slight grit when you run your thumb across the rim. This chalkiness is the rubber oxidizing. The jelly will act as a deep conditioner, penetrating those micro-cracks.
Conversely, homes relying on hard well water see different symptoms. The high calcium content creates microscopic bumps on the porcelain valve seat itself. The rubber isn’t necessarily degrading, but it can no longer bridge the gap over those tiny mineral mountains. The jelly here acts as a flexible gasket, filling the negative space between the hardened flapper and the uneven porcelain. You might need a slightly thicker application, perhaps the size of a dime rather than a pea.
- Gym grade polyurethane finishes emit toxic fumes in residential basements.
- Artificial turf prices double amid major European soccer stadium upgrades.
- Hydrogen peroxide restores blackened shower grout lines without damaging sealant.
- Leaking toilet flappers seal instantly using standard petroleum jelly coating.
- Heavy cardboard tubes neatly secure thick garage extension cords instantly.
The Five-Minute Rejuvenation Protocol
Fixing this requires almost no physical force. You are simply preparing a surface to accept a barrier layer. Turn off the water supply valve near the baseboard and flush the toilet to completely empty the tank.
Keep your movements deliberate and steady. Reach in and unhook it from the two small pegs on the overflow tube. You don’t need any tools for this part; just your fingers gently working the rubber arms free.
- Dry the flapper completely using an old cotton towel, pressing firmly to remove lingering moisture.
- Wipe down the circular porcelain flush valve seat at the bottom of the tank to remove any stagnant algae or slime.
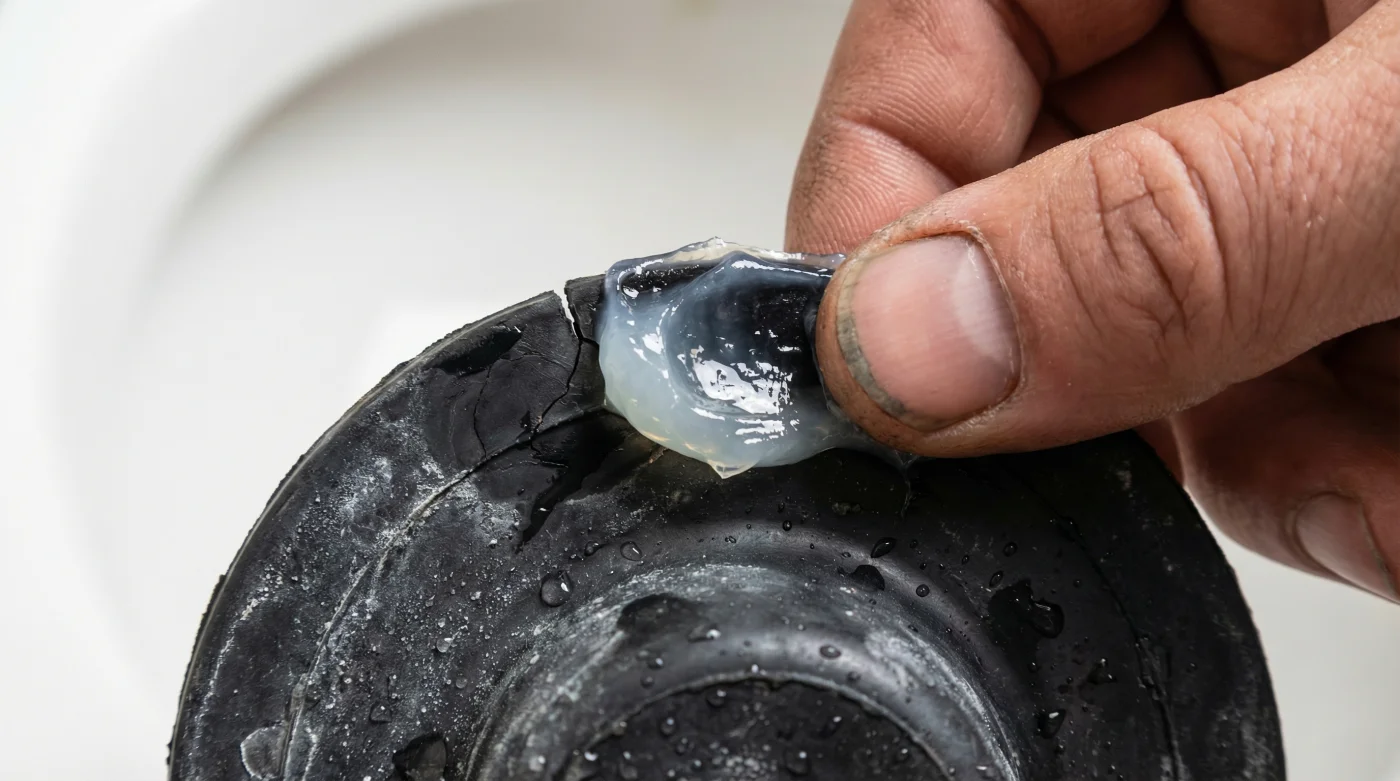
- Scoop up a pea-sized amount of standard petroleum jelly on your index finger.
- Massage the jelly evenly around the bottom ring of the rubber, creating a thin, consistent gloss without clumps.
Reattach the piece to the pegs and reconnect the chain. Turn the water back on and watch the tank fill. You have just created a hydrophobic barrier that marries rubber back to porcelain.
Restoring Peace and Quiet
There is a specific kind of satisfaction that comes from solving a mechanical problem with household logic rather than brute force. You didn’t strip any threads, and you didn’t spend an afternoon watching video tutorials on wrench techniques.
By understanding the nature of the materials in your home, you step off the treadmill of constant consumption and replacement. A running toilet is no longer an impending weekend project; it is just a five-minute maintenance task. You get to fall asleep without the sound of trickling water, knowing exactly how you fixed it.
“A good repair doesn’t always mean new parts; it often just means restoring the relationship between the pieces you already have.”
| Key Point | Detail | Added Value for the Reader |
|---|---|---|
| Diagnosis | Identify if the leak is from a warped flapper rather than a cracked valve. | Saves you from buying unnecessary hardware kits. |
| Preparation | Drying the rubber completely before applying any product. | Ensures the jelly adheres properly and creates a waterproof bond. |
| Application | Using only a pea-sized drop of petroleum jelly. | Prevents messy residue from clogging smaller valves down the line. |
Common Questions on Flapper Restoration
Is petroleum jelly safe for all plumbing systems? Yes, when used in tiny amounts on tank flappers, it will not degrade standard rubber or harm your pipes.
How long will this temporary fix hold up? Many homeowners find this seal restoration lasts six months to a year, buying plenty of time before a true replacement is needed.
Do I need to scrub off the old calcium buildup first? A gentle wipe with a cloth is enough; harsh scrubbing might tear the aging rubber.
Can I use silicone grease instead? Absolutely, plumbers grease or 100 percent silicone grease works perfectly if you happen to have it in the garage.
What if the tank still leaks after coating it? If the hiss continues, the flapper might be physically torn or the flush valve seat itself is cracked, requiring a full replacement.