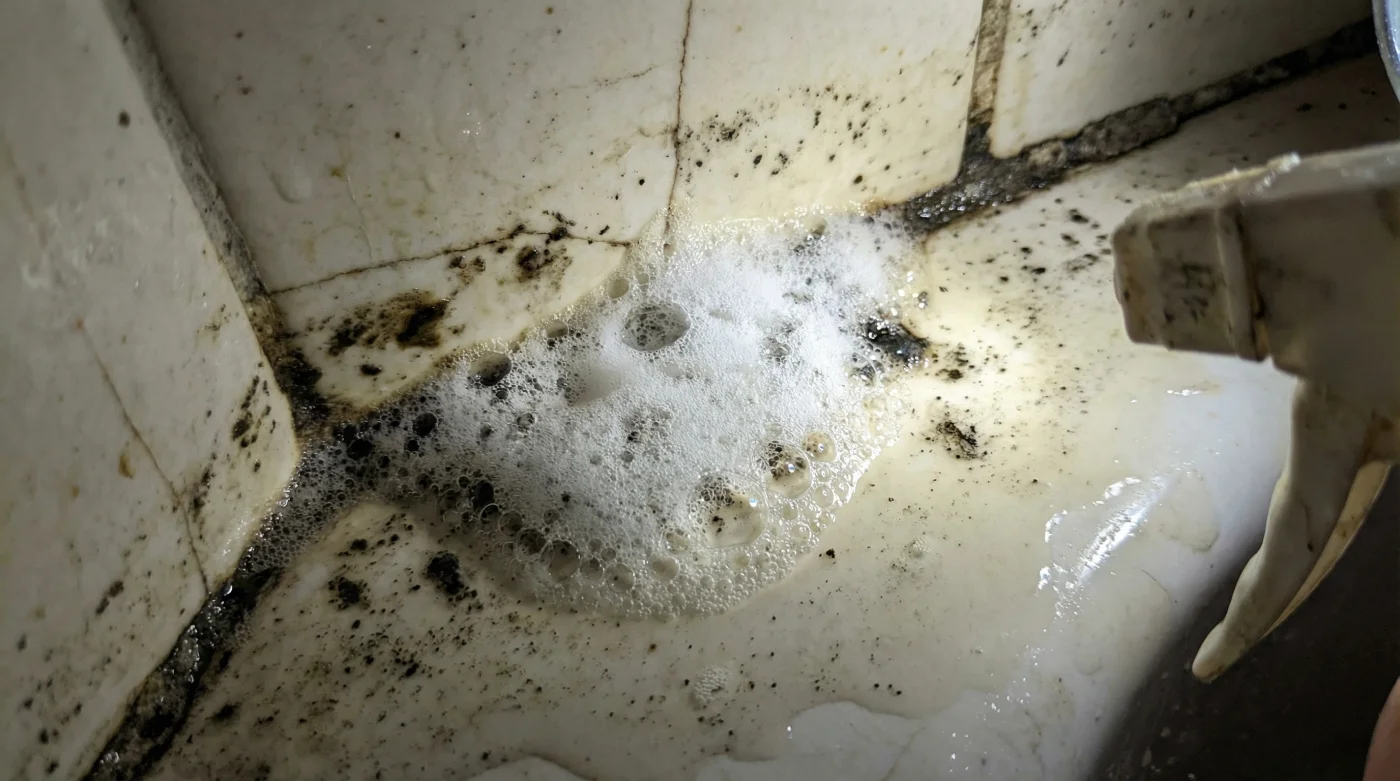
The bathroom mirror is fogged. You are kneeling on the cold floor, scrubbing brush in hand, staring at the darkened lines between the tiles. The harsh sting of chlorine bleach fills your lungs, making your eyes water. You have been told this is the only way to beat back the creeping shadow of mold, forcing yourself to scrub harder as the fumes gather in the small space.
But every time you flood those lines with bleach, the problem seems to return faster. The surface looks bright for a week, then the shadows creep back darker than before. Bleach strips the protective sealant, leaving the porous grout underneath exposed like an open wound, ready to absorb the next wave of moisture and feed the very spores you are trying to destroy.
There is a quieter, far more effective method hiding right in your medicine cabinet. The brown bottle of hydrogen peroxide does not attack the structure of your home. It breathes through it. When applied correctly, it fizzes and lifts the microscopic spores without dissolving the fragile matrix holding your shower together.
You are about to trade a chemical warzone for a simple chemical reaction. This is not just about making things look bright again; it is about understanding the breathing walls of your home and working with them, rather than scrubbing them into submission.
The Breath of the Matrix
Think of the grout between your tiles not as stone, but as a hardened sponge. It is a porous matrix designed to hold the tiles in place while allowing minor shifts. When you use chlorine bleach, you are essentially pouring acid onto that sponge. It burns the top layer off, masking the stain by bleaching it white, but doing nothing to the roots of the mold hiding deep inside the pores.
Peroxide works entirely differently. It does not bleach the surface; it oxygenates the space. When it touches organic matter like mold, it releases extra oxygen molecules in a slow, steady fizz. These tiny bubbles act like microscopic elevators lifting debris, gently carrying the deep-seated spores out of the pores without compromising the structural integrity of the grout or degrading the expensive silicone sealant nearby.
Marcus Vance, a 54-year-old historic tile restorer in Chicago, swears by this exact mechanism. Working on hundred-year-old bathhouses, he realized decades ago that industrial cleaners were turning vintage mortar to dust. “Bleach is a bully,” he often tells his apprentices. “Peroxide is a negotiator.” By switching to a simple peroxide protocol, he managed to save entire murals of original tile that would have otherwise crumbled and washed down the drain.
Matching the Method to the Mess
Not all grout lines suffer the same fate. The bottom corners of a poorly ventilated shower require a different touch than the mostly dry tiles near the ceiling. Adapting your peroxide application saves you time and protects your bathroom’s fragile micro-environment from unnecessary wear.
For the Heavy Shadows (The Paste Method)
When the mold has set up permanent camp in the lower corners, liquid peroxide alone runs off too fast. You need a holding agent. Baking soda is your perfect neutral partner. It does not react violently, but it creates a thick paste that clings to vertical surfaces, keeping the peroxide suspended directly over the target zone so the oxygen can penetrate deeply.
For the Weekly Refresh (The Straight Spray)
- Gym grade polyurethane finishes emit toxic fumes in residential basements.
- Artificial turf prices double amid major European soccer stadium upgrades.
- Hydrogen peroxide restores blackened shower grout lines without damaging sealant.
- Leaking toilet flappers seal instantly using standard petroleum jelly coating.
- Heavy cardboard tubes neatly secure thick garage extension cords instantly.
The Oxygen Protocol
The real secret to this restoration lies in patience. We are so used to scrubbing aggressively that standing still feels wrong. But the oxygen needs time to expand and do the physical lifting for you.
Gather your supplies quietly. A small bowl, a stiff-bristled brush with nylon bristles, your brown bottle, and a damp cloth. Let the reaction do the heavy lifting, sparing your elbows, your lungs, and the structural integrity of your shower.
- Mix the poultice: Combine half a cup of baking soda with just enough three-percent hydrogen peroxide to form a thick, frosting-like paste.
- Apply the layer: Smear the paste directly onto the blackened grout lines, ensuring they are completely covered. Do not rub it in yet.
- Wait for the fizz: Leave the paste to sit for exactly fifteen minutes. You will hear a faint crackling sound as the oxygen bubbles lift the spores.
- Agitate gently: Take your soft nylon brush and scrub in small, circular motions. The grime will turn the white paste a muddy brown.
- Rinse clean: Wipe the area away with a warm, damp cloth, revealing the original color of the grout.
Tactical Toolkit: Keep your supplies specific. Use only standard 3% topical hydrogen peroxide. Give the paste a full 15 minutes of dwell time, or 5 minutes for straight liquid sprays. Always use a nylon bristle brush to avoid scratching the tile glaze, and keep an opaque spray bottle for storage.
A Quieter Clean
Stepping back into a bathroom that smells like nothing at all—rather than an indoor swimming pool—changes how you experience your morning routine. You haven’t just cleaned a room; you have healed the immediate environment by working with the materials rather than against them.
By trusting the gentle oxygenating action over harsh corrosives, you preserve the invisible systems holding your home together. The sealant stays watertight, the grout remains solid, and the mold is evicted from the roots up. It is a mindful shift from fighting your home to simply caring for it.
“True restoration doesn’t force a material to change; it gently removes what doesn’t belong so the original structure can breathe again.”
| Key Point | Detail | Added Value for the Reader |
|---|---|---|
| Oxygenation vs. Bleaching | Peroxide lifts spores with oxygen bubbles rather than burning the surface layer white. | Permanently removes deep mold roots instead of temporarily masking the color. |
| Sealant Protection | Chlorine degrades silicone caulking; peroxide leaves it entirely intact. | Saves you from having to scrape and recaulk your shower every year. |
| Matrix Preservation | The fizzing action cleans without eroding the porous cement-based grout. | Prevents crumbling grout lines and costly future regrouting projects. |
Frequently Asked Questions
Can I use a higher concentration than 3% peroxide? Stick to the standard 3% household peroxide. Higher concentrations used in hair bleaching can be too aggressive and require safety gear to handle safely.
Why does the peroxide need an opaque bottle? Hydrogen peroxide breaks down into plain water when exposed to UV light. The brown bottle or an opaque sprayer keeps the chemical stable and effective.
Is it safe to mix peroxide with white vinegar? No. Mixing hydrogen peroxide and vinegar creates peracetic acid, which can irritate your skin and lungs, and may degrade your grout over time. Use them separately.
How often should I use the paste method? The paste is a restorative treatment. Use it once or twice a year for deep cleaning, and rely on the spray method for weekly maintenance.
Will this fix grout that is already crumbling? Peroxide will clean the remaining grout gently, but it cannot replace missing material. If your grout is actively crumbling, it is time to scrape the loose pieces and apply fresh grout.