The morning light catches the edge of that faux-subway tile you pressed onto the kitchen wall three years ago. Back then, it felt like a quiet rebellion against a sterile rental unit. Today, it just feels tired. You run a thumb over a slightly raised corner, feeling the stiff resistance of the vinyl, and that familiar, heavy knot of anxiety settles in the pit of your stomach.
Pulling it off means risking the paint. That is the universal renter’s fear—the nightmare of chipped drywall, angry property managers, and your security deposit evaporating into thin air. You imagine the tearing sound, the chalky white dust, the hours spent patching and sanding a mistake that was supposed to make you feel at home.
But that anxiety is based on a misunderstanding of how things stick together. We tend to view adhesive as a permanent state, an unyielding chemical weld that must be violently scraped away with heavy tools. The professional reality is much quieter, requiring patience rather than brute force.
The secret to a clean removal isn’t a harsh chemical solvent or a sharp putty knife. It relies on a single, everyday tool sitting in your bathroom right now. By understanding how temperature manipulates glue, you can safely dismantle your past design choices without leaving a single wall scar behind.
The Physics of Letting Go
Think of the glue behind those vinyl squares like a stick of butter sitting on a kitchen counter. When the room is cold, that butter is rigid. If you try to spread it over a piece of soft bread, it will tear the crumb to shreds. But if you let that butter warm up just enough, it yields, spreading smoothly without damaging the delicate surface underneath.
This is the core logic of peel-and-stick backing. The adhesive is a thermoplastic compound. When resting at room temperature, it locks onto microscopic drywall pores, holding firm. If you pull it cold, you tear the crumb—meaning your painted drywall paper comes off with it.
By introducing targeted, controlled heat, you soften the grip. You change the physical state of the glue from a rigid claw to a soft, tacky gel. The mundane hair dryer transforms from a morning styling appliance into an instrument of precision release.
I learned this watching Marcus Thorne, a 42-year-old set decorator in Chicago. He builds and tears down fully functioning kitchens on soundstages every week, often dealing with the cheapest, flimsiest backdrop flats imaginable. One afternoon, while I watched him dismantle a fake coffee shop, he didn’t reach for a scraper. Instead, he plugged in a battered, paint-splattered Conair hair dryer. He held it six inches from the wall, swaying it gently like a pendulum. “The wall isn’t fighting you,” he said, peeling away a heavy vinyl backsplash with one continuous, silent motion. “The cold environment is.”
Adjusting for Your Wall’s History
Not all surfaces react to warmth the exact same way. Recognizing what lives beneath your temporary design is the first step in calibrating your approach. A minor adjustment in your technique ensures the wall remains perfectly intact.
For the standard rental, most apartments feature flat, matte-painted drywall. This surface is highly porous, meaning the adhesive has likely sunken deep into the paint layers. You need a slow, sweeping motion with the hair dryer on medium heat. Rushing this process on flat paint is the fastest way to pull flakes of the landlord’s ‘builder-grade white.’
If you placed your peel-and-stick over existing glossy ceramic tiles to hide an outdated floral pattern, the stakes are lower but the method changes. Glossy surfaces don’t absorb adhesive. You can use high heat here, focusing directly on the center of the tile to soften the glue rapidly, allowing the entire sheet to slip off the smooth glaze beneath without any resistance.
Older spaces often feature lath and plaster walls covered in decades of oil paint. Plaster can be brittle, and old paint can separate from it unpredictably. For this, keep the heat on low and hold the dryer at least eight inches away. You want to warm the environment around the tile, breathing through a warm pillow of air rather than blasting it directly.
The Mechanics of a Clean Lift
Removing these tiles is a quiet, deliberate practice. You are coaxing the material to release, not forcing it. Find a comfortable rhythm and resist the urge to rush when the first few pieces come off easily.
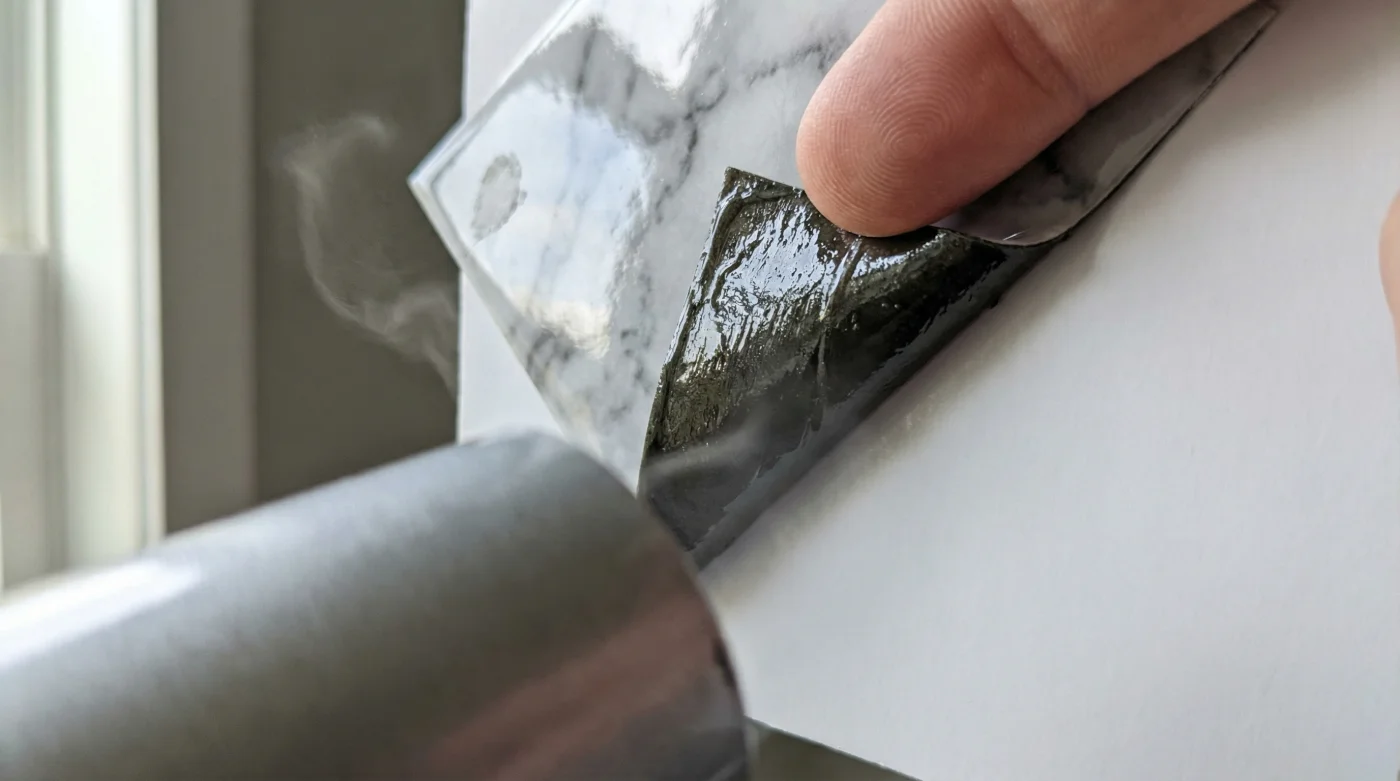
Work in small, isolated sections. Begin at an upper corner, as gravity will naturally assist your pulling motion. Set your appliance to the medium heat setting, holding the nozzle exactly six inches away. Sweep back and forth for 30 to 45 seconds until the vinyl feels warm to the touch. Slide a plastic putty knife under the softened corner, and pull the tile back at a tight 45-degree angle, keeping tension near the wall.
As you pull, keep the air flow aimed at the seam where the tile meets the wall. You are melting the tension away as you move downward. If you feel resistance, stop pulling and apply more heat.
The tactical toolkit requires very little. You want a temperature of around 140 degrees Fahrenheit out of the nozzle. Maintain a distance of six inches from the surface. Spend 45 seconds per corner, applying continuous heat during the pull. Rely on a standard 1800-watt hair dryer, a flexible plastic scraper, and quiet patience.
The Freedom of the Temporary
When the last square falls away, leaving behind a completely intact, perfectly boring white wall, the relief is palpable. You haven’t just saved a few hundred dollars; you’ve proven to yourself that taking a design risk in a temporary space carries no permanent penalty.
We often hesitate to alter our living environments because we fear the consequences of undoing it. Mastering this quiet, heated release shifts that narrative. It turns a frustrating chore into a simple reset button for physical spaces, proving that personal expression doesn’t require permanent damage.
You are no longer bound by the anxiety of perfect permanence. You can stick a bold, dark green geometric pattern in your bathroom today, knowing that next year, a warm breeze from a bathroom appliance is all it takes to wipe the slate clean. It is the absolute permission to make your current space truly yours, even if you are just passing through.
“True craftsmanship isn’t just about how well you build something; it’s about knowing how to dismantle it without leaving a trace behind.”
| Key Action | Detail | Added Value for You |
|---|---|---|
| Medium Heat Setting | Maintains 140°F air stream from six inches away. | Softens glue without melting the actual vinyl material. |
| The 45-Degree Pull | Keeping the tile pulled back flat against the wall. | Reduces outward pulling stress on fragile drywall paper. |
| Plastic Putty Knife | Using a flexible, rounded plastic edge to lift corners. | Prevents accidental gouging of soft plaster or paint. |
Common Removal Questions
Will a heat gun work better than a hair dryer?
A heat gun is far too powerful and can actually melt the vinyl into a messy, unmanageable goo. Stick to the gentler warmth of a standard hair dryer.
What if there is a sticky residue left behind?
If small patches of glue remain, wait for them to cool slightly, then rub them gently with your thumb or apply a tiny drop of mineral oil on a rag to dissolve the tackiness.
Can I reuse the tiles after peeling them off?
Unfortunately, no. The slight stretching of the vinyl during removal and the contamination of the adhesive with microscopic wall dust means they won’t stick reliably a second time.
Does this technique work on traditional wallpaper?
Traditional wallpaper uses water-based pastes, so heat alone won’t break the bond. However, this method is highly effective on modern peel-and-stick vinyl wallpapers.
How long should I wait before painting the wall?
Give the wall a quick wash with mild soapy water to remove any invisible adhesive oils, let it dry for 24 hours, and you are perfectly safe to apply a fresh coat of paint.